Upload options
Computer, Google Drive or Dropbox
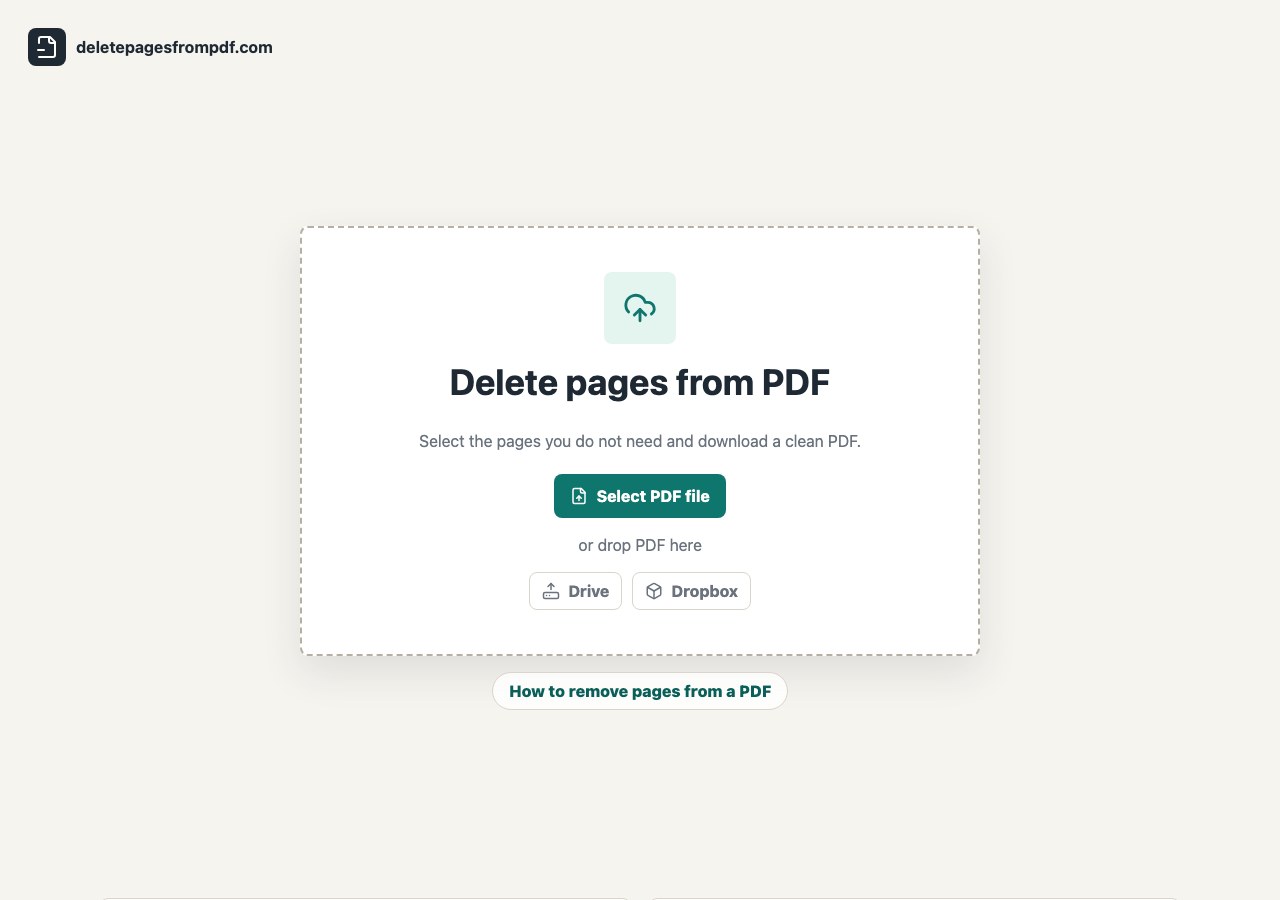
Start with a local file, drag and drop a PDF or use the cloud import buttons to pull in a PDF from Google Drive or Dropbox.
PDF page remover tutorial
Use this guide to import a PDF from your computer, Google Drive or Dropbox, remove unwanted pages, save the edited file, upload it back to cloud storage and share it with a link, QR code, WhatsApp, email or Messenger.
Upload options
Start with a local file, drag and drop a PDF or use the cloud import buttons to pull in a PDF from Google Drive or Dropbox.
Editing
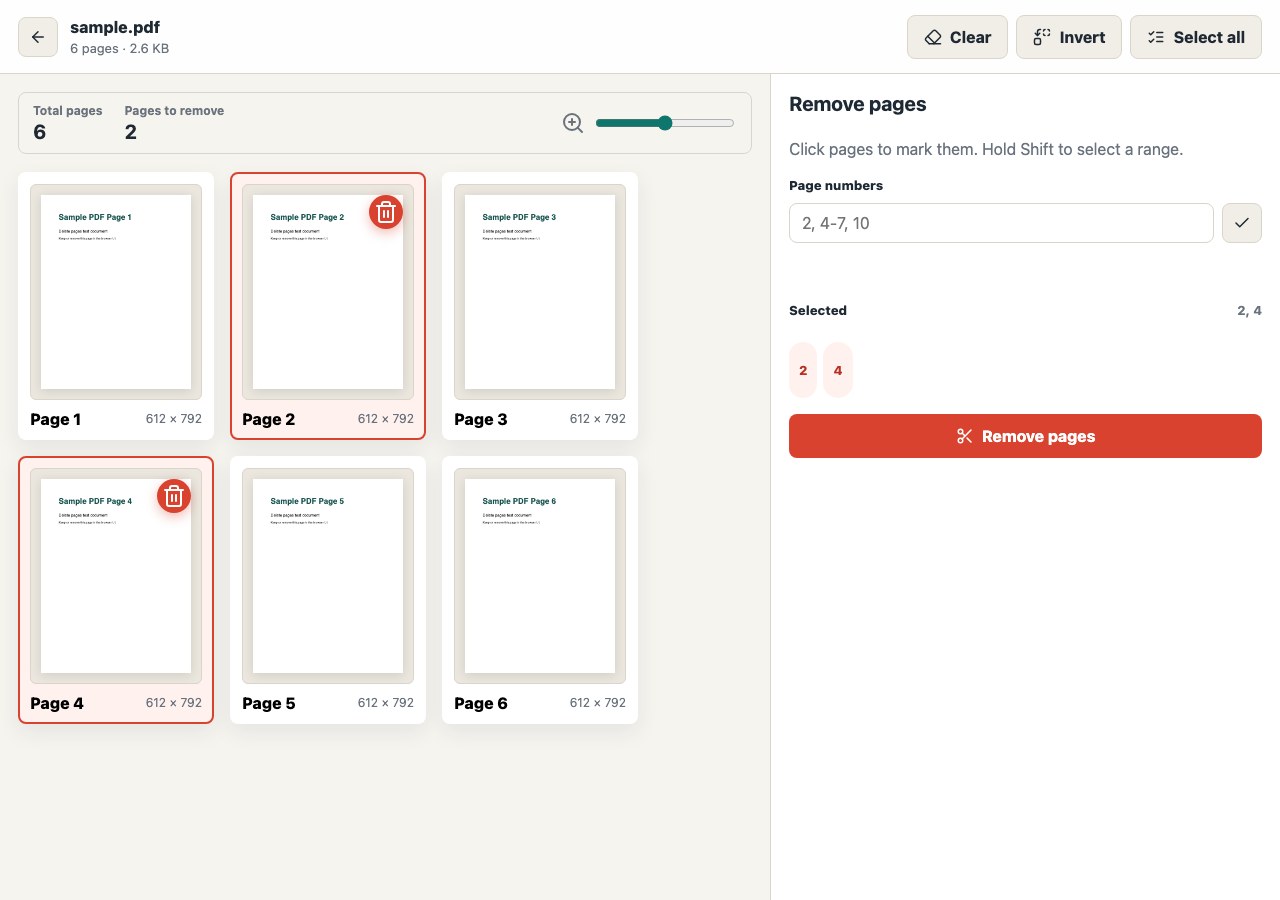
Resize the page thumbnails, click pages, use shift for ranges or type page numbers before creating the edited PDF.
Save and share
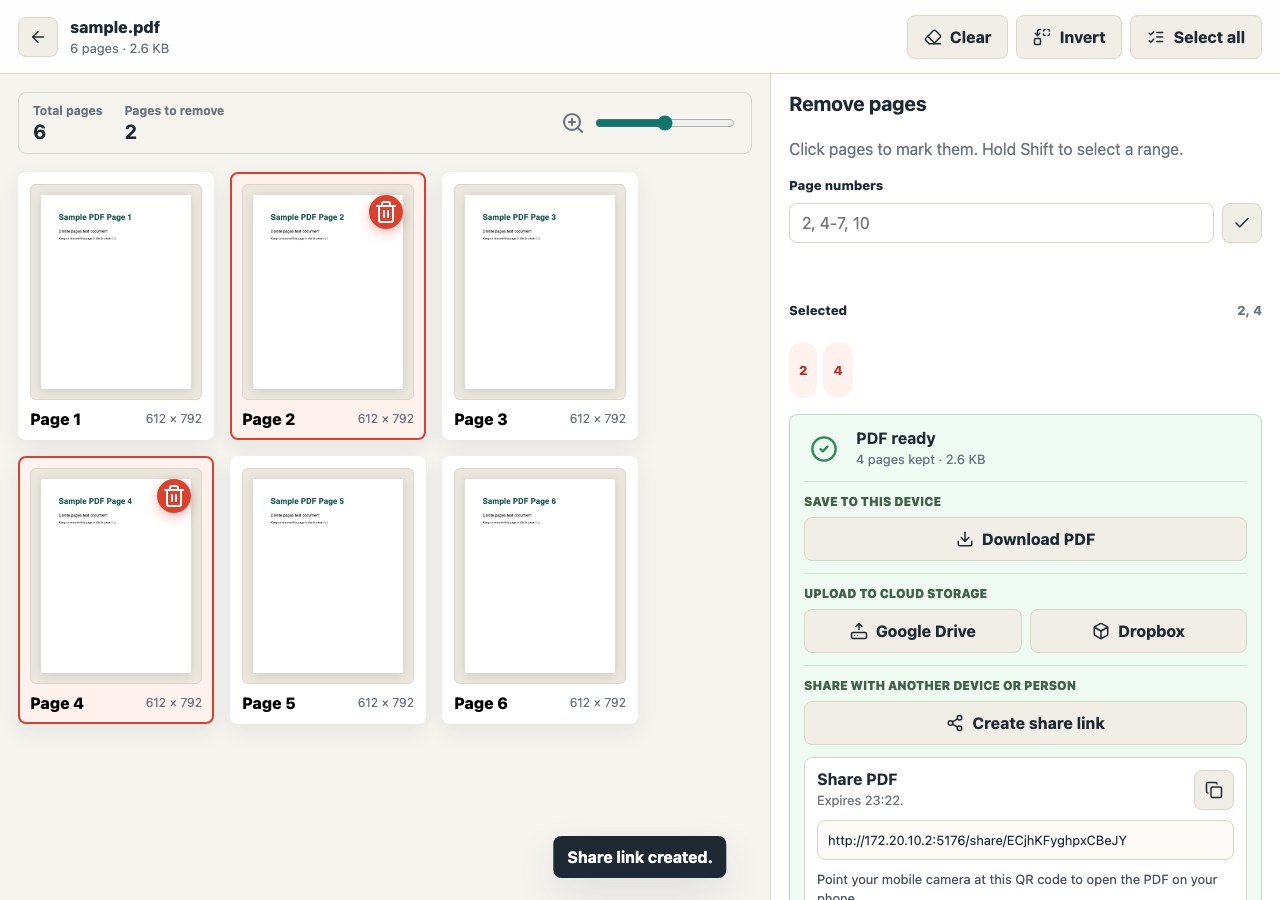
After page removal, download the PDF, upload it to Drive or Dropbox or create a temporary share link with QR and messaging options.
Step-by-step guide
This process is useful for scanned files, application packets, contracts, invoices, reports and any PDF where blank pages, duplicate pages, cover sheets, or private pages need to be removed before saving or sending.
Step 1
Open the home page and choose the source for the original PDF. You can start from a file on your computer or import from cloud storage.
Step 2
After the PDF opens, each page appears as a thumbnail. Use the thumbnail size slider above the pages to make previews smaller or larger.
Step 3
Mark the pages you want to delete before creating the edited PDF. Selected pages show a red border and trash badge so you can review the choice before exporting.
Safety check
The app prevents creating an empty PDF. If every page is selected, remove pages stays blocked until you leave at least one page unselected.
Step 4
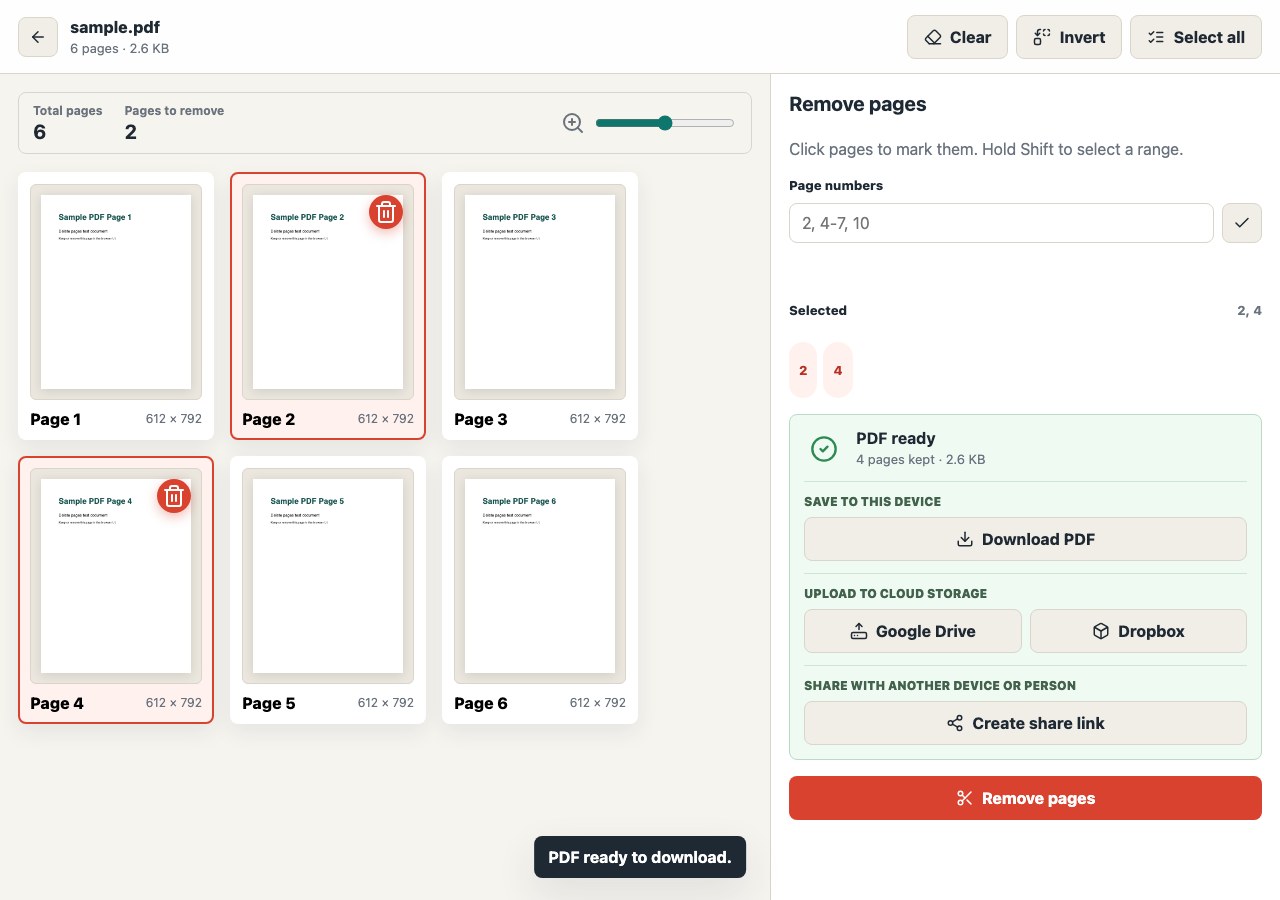
Click Remove pages. The app creates a new PDF without the selected pages and shows a PDF ready panel with the number of pages kept and the final file size.
Step 5
The cloud upload buttons send the newly created PDF, not the original file. Choose the destination that should store the cleaned document.
Cloud permissions
Cloud import and cloud upload use provider authorization.
Step 6
Click Create share link after the PDF is ready. The app creates a temporary link for the edited PDF and displays a QR code for moving the PDF from desktop to phone.
Step 7
The message buttons prepare a share message with the temporary PDF link. Pick the channel that matches how the recipient should receive the file.
 WhatsApp
 Email
Email
 Messenger
Step 8
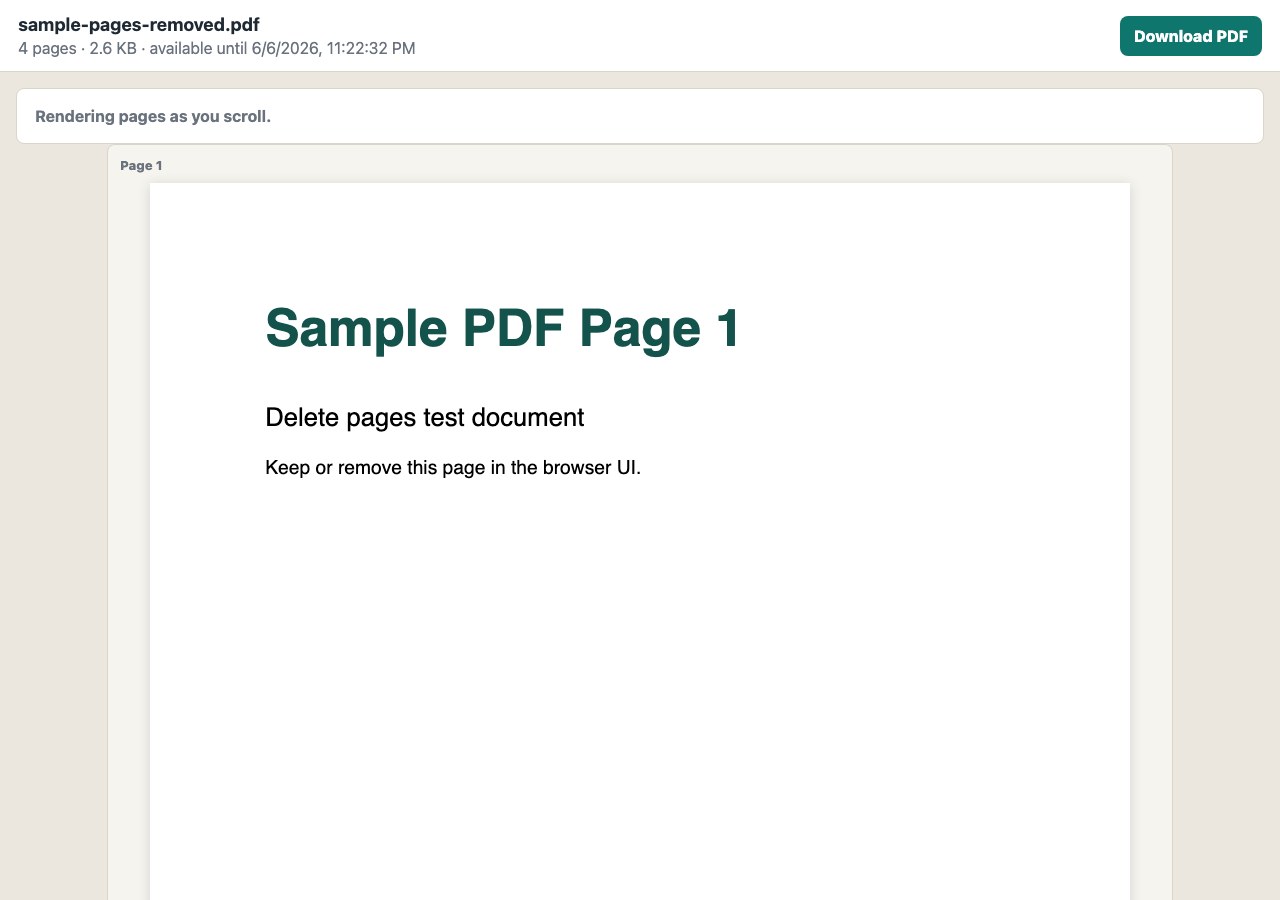
The shared PDF page opens the document automatically and keeps the Download PDF button available. The viewer renders pages as the recipient scrolls.
Privacy and temporary files
The basic page-removal workflow runs in the browser. If you create a share link, the edited PDF is temporarily stored so another browser or phone can open it from the link or QR code. Shared links expire after 2 hours.